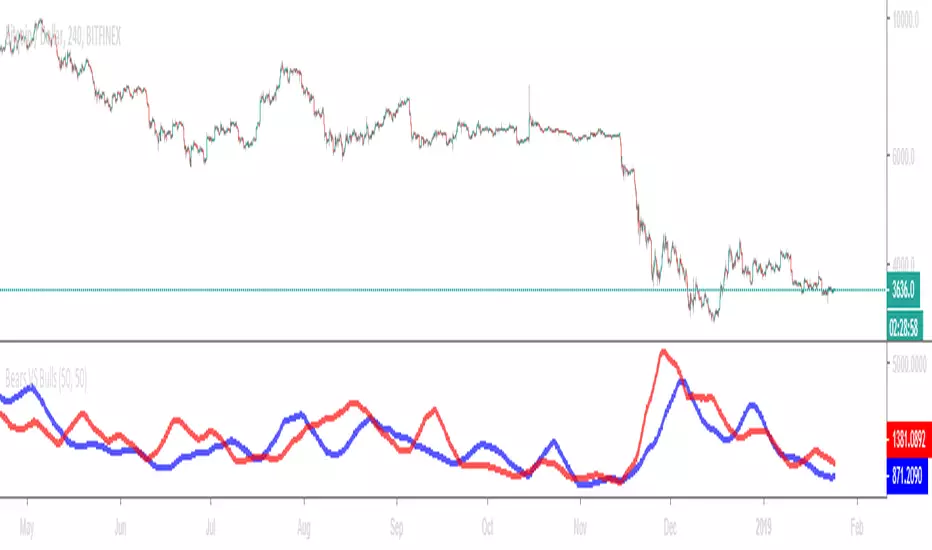
Stochastique Divergences IndicatorHello,
I made a custom indicator.
Divergences with stochastique and price are really strong signals.
About the indicator
A bullish divergence happens when the stoch K makes a higher low and is depicted by a green triangle up.
A bearish divergence happens when the stoch K makes a lower high and is depicted by a red triangle down.
This script is the base for my next strategy that I should upload soon.
I will grant access (to this script and my others) to people willing to make a small donation.
Here is my BTC address : 19sVQvCDmVfEACq7BiMnWSMqFPZ8qfSQ2K
If you prefer ETH : 0xc8a5d3a63a05db0c2363ea1c08b37a01cce9ebfb
Send me a Private Message with the ID of the transaction
If you want to do some forward testing first, send me a message.
Also check blockchainfiesta.com
Поиск скриптов по запросу "bear"
wTF50This is a customized trend filter that has several uses:
It helps identify trend direction, either bullish or bearish
It distinguishes between a pullback and a trend reversal
It helps identify areas where traders should stand aside
It highlights areas of consolidation
dTF50This is a customized trend filter that has several uses:
It helps identify trend direction, either bullish or bearish
It distinguishes between a pullback and a trend reversal
It helps identify areas where traders should stand aside
It highlights areas of consolidation
OBV divergence hidden and regular on both bearish and bullish.OBV (on balance volume) divergence indicator with hidden and regular signal on both bearish and bullish.
CMYK VRMI◊ Introduction
This script indicates the relative movement of price x volume.
◊ Origin
Based on 'The Relative Momentum Index' by Roger Altman : February, 1993 issue of Technical Analysis of Stocks & Commodities magazine.
While RSI counts up and down days from close to close, the Relative Momentum Index counts up and down days from the close relative to a close x number of days ago.
This results in an RSI that is smoother. The input has been changed to the change of a smoothed close multiplied by a smoothed volume.
The polarity of VRMI indicates bearish/bullish movement.
◊ Adjustments
CMYK color theme applied.
◊ Usage
VRMI indicates the force the market moves with.
◊ Future Prospects
-
◊ ◊ ◊ ◊ ◊ ◊ ◊ ◊ ◊ ◊ ◊ ◊ ◊ ◊ ◊ ◊ ◊ ◊ ◊ ◊ ◊ ◊ ◊ ◊ ◊ ◊ ◊ ◊ ◊ ◊ ◊ ◊ ◊ ◊ ◊ ◊ ◊ ◊ ◊ ◊ ◊ ◊ ◊ ◊ ◊ ◊ ◊ ◊ ◊ ◊ ◊ ◊ ◊ ◊ ◊ ◊ ◊ ◊ ◊ ◊ ◊ ◊ ◊ ◊ ◊ ◊ ◊ ◊ ◊ ◊ ◊ ◊ ◊ ◊ ◊ ◊ ◊ ◊ ◊ ◊ ◊ ◊ ◊ ◊ ◊ ◊ ◊ ◊ ◊ ◊ ◊ ◊ ◊ ◊ ◊ ◊ ◊ ◊ ◊ ◊ ◊ ◊ ◊ ◊ ◊ ◊
CMYK VRMI RAYS ◊ Introduction
Introducing VRMI in this script, an RMI based on price movement and volume, to indicate bullish and bearish trends.
This script marks the background depending on RMI <> VRMI , VRMI polarity and large buy/sell sprees.
◊ Origin
Based on 'The Relative Momentum Index' by Roger Altman : February, 1993 issue of Technical Analysis of Stocks & Commodities magazine.
While RSI counts up and down days from close to close, the Relative Momentum Index counts up and down days from the close relative to a close x number of days ago.
This results in an RSI that is smoother.
In addition VRMI reacts quick, it is used to cut off latency from RMI, and it's polarity indicates the beginning and end of a trend.
Large buy sell sprees and detected in their proportion with an sma on the volume
◊ Adjustments
CMYK color theme applied.
◊ Usage
This indicator can be used to detect trends and mark reversals.
◊ Prospects
◊ ◊ ◊ ◊ ◊ ◊ ◊ ◊ ◊ ◊ ◊ ◊ ◊ ◊ ◊ ◊ ◊ ◊ ◊ ◊ ◊ ◊ ◊ ◊ ◊ ◊ ◊ ◊ ◊ ◊ ◊ ◊ ◊ ◊ ◊ ◊ ◊ ◊ ◊ ◊ ◊ ◊ ◊ ◊ ◊ ◊ ◊ ◊ ◊ ◊ ◊ ◊ ◊ ◊ ◊ ◊ ◊ ◊ ◊ ◊ ◊ ◊ ◊ ◊ ◊ ◊ ◊ ◊ ◊ ◊ ◊ ◊ ◊ ◊ ◊ ◊ ◊ ◊ ◊ ◊ ◊ ◊ ◊ ◊ ◊ ◊ ◊ ◊ ◊ ◊ ◊ ◊ ◊ ◊ ◊ ◊ ◊ ◊ ◊ ◊ ◊ ◊ ◊ ◊ ◊ ◊
Bullish and Bearish Engulfing Patterns auto detectionThis simple indicator detects automatically most important bullish and bearish candlestick patterns formations. Used to locate potential supply and demand imbalances.
Copyright 2017 Alfonso Moreno www.set-and-forget.com
Super Envolvente (Bullish y Bearish)Identificador de Super-envolventes (SE), se encarga de darle un color verde a la SE alzista (Bullish) verde y rojo a la bajista (Bearish).
Bears VS BullsThis indicator will work on ANY instrument.
The red line is a moving average of ONLY sellers in the market.
The blue line is a moving average of ONLY buyers in the market.
The period or "length" of the individual moving averages can be adjusted in the indicator settings.
The default, it is set to 50.
Buying and selling trends often provide indications of market moves such as the most recent bottom in Cryptocurrencies.
Feel free to comment and share any indicator concepts or ideas for content you would like to see added to the Technical Indicator Bundle on www.kenzing.com
Bearish Trailing stopIt is a trailing SL. Works very well. Good good very good. Looks like my description needs more, so here is more random text.
bearish Price Below PDL - Complete Multi-Confirmation Alert🎯 KEY IMPROVEMENTS:
1. Enhanced Alert Visibility:$jmoskyhigh
✅ HUGE triangle down marker with "SELL" text
✅ Alert title: "SELL SIGNAL - PDL BREAKDOWN CONFIRMED"
✅ Prominent info panel with red theme
✅ Clear "SELL ALERT: TRIGGERED" status
2. Better Visual Feedback:
Red frame around info panel
Larger shapes and markers
Color-coded confirmations (green = OK, red = FAIL)
Progress percentage displayed
Breakdown price label
3. Complete Alert System:
Main Alert: "SELL SIGNAL - PDL BREAKDOWN CONFIRMED"
Early Warning: "PDL Breakdown Started - Monitoring"
Reset Alert: "Confirmation Lost - Breakdown Reset"
Bearish signal using Point of Control (POC) with PAC by guruThis indicator code helps traders identify potential sell opportunities using several important technical indicators:
Point of Control (POC) – This is the price level where the most volume was traded over the past several days.
Previous Day's Low – This shows the lowest price reached during the previous day.
PAC (Price Action Channel) EMA – These are two moving averages (one based on the low price and one based on the close price) that help determine if the price is trending within a certain range.
Volume SMA – This is a 3-day simple moving average (SMA) of volume, which helps filter out signals based on market activity.
What the Script Does:
Point of Control (POC):
The script looks at the last 50 days (configurable) and calculates which price level had the highest trading volume.
It then plots a red line on the chart at the POC level. This is important because it helps identify areas where there was strong market interest in the past.
Volume Moving Average:
The script calculates a 3-day SMA of volume, but it excludes the current day to avoid premature signals based on today’s trading.
The volume SMA is used to ensure there’s enough market activity (with a threshold set to 25 units) before triggering a sell signal.
Price Action Channel (PAC) EMA:
The PAC consists of two exponential moving averages (EMAs):
The PAC Low EMA: This is based on the low prices over the last 34 periods (configurable).
The PAC Close EMA: This is based on the closing prices over the last 34 periods.
These EMAs help determine if the price is trending above or below certain price levels.
Sell Signal Logic: The script checks three conditions before displaying a "Sell" signal:
Price Below POC and Previous Day’s Low:
The close price must be below both the Point of Control (POC) and the previous day's low.
Volume SMA Above 25:
The 3-day volume SMA must be greater than 25. This ensures the signal only triggers when there’s enough trading volume in the market.
Today’s Low is Above PAC EMAs:
Today's low price must be above both the PAC low EMA and the PAC close EMA. This prevents sell signals when prices are already significantly below the PAC, indicating possible exhaustion in the downtrend.
If all three conditions are met, the script will display a red "Sell" label on the chart, signaling a potential selling opportunity.
No Sell Signal if Price Reverses:
If the price crosses back above the POC or the previous day's low, the script will remove the sell signal and reset for a new opportunity.
Summary of Conditions:
For the script to display a "Sell" label:
The close price must be below the Point of Control (POC) and the previous day’s low.
The 3-day volume SMA (excluding today) must be greater than 25 units.
The low price of the current day must be above both the PAC low EMA and the PAC close EMA.
If these conditions are met, a red sell label appears on the chart as a potential signal for a short (sell) trade.
Bearish FS Continuation S1BB - baby bar / inside bar
DF - downflow, meaning 20MA below 50MA
EXE - execution bar, indicator to short
Mainly to identify execution bar for shorting using inside bar identification and force top
Guneet-ScalperBearish trend candle color change to red with sell print
Bullish trend candle color change to green with buy print
thanks
jas toor
DSMS - DeltaSurge Matrix Station - 1M Scalping [SurgeGuru]DSMS - DeltaSurge Matrix Station
HOW TO READ THE CHART
=====================================
This guide explains every visual element you see on the chart.
DSMS is a volume profile + order flow indicator built for 1-minute Bitcoin scalping.
It shows WHERE institutional money is sitting and WHERE price is likely to react next.
=====================================
1. THE VOLUME PROFILE (left side of chart)
=====================================
The colored horizontal bars extending left from the candles are the volume profile.
Each bar represents a price level (called a "bin") and shows how much volume traded there.
LONGER BAR = more volume at that price.
BAR COLOR tells you who is in control:
- Green/teal bar = buyers dominated that level (bullish delta)
- Red/orange bar = sellers dominated that level (bearish delta)
- The more intense the color, the stronger the imbalance
SPLIT BARS (bull/bear breakdown):
If enabled, each bar splits into two halves showing exact buy vs sell volume.
Top half = sell volume, bottom half = buy volume.
HEATMAP (wide faded bars behind the profile):
The large transparent boxes behind the profile bars are the heatmap.
They show the same delta information but stretched wider for quick visual scanning.
Bright = high conviction. Faded = low conviction.
=====================================
2. KEY PRICE LEVELS ON THE PROFILE
=====================================
POC (Point of Control):
The bin outlined with a bright border is the POC -- the single price level
with the MOST volume. Price tends to gravitate back to the POC.
A small label shows the POC price and context like "EQUILIBRIUM" or "BULL ATK".
POC FLASH LINE:
A short dashed cyan line appears at the POC when a bounce is detected.
Trigger conditions: price is at the POC, the current candle is bullish after
a bearish candle, and volume is at least 1.2x average. This signals that
the POC is acting as active support and price is reacting to it in real time.
VA HIGH / VA LOW (Value Area lines):
Two horizontal lines mark the top and bottom of the Value Area -- the price range
where approximately 70% of volume traded. These act as support and resistance.
- VA High = resistance when price is below, breakout level when price pushes above
- VA Low = support when price is above, breakdown level when price drops below
When a breakout happens, the line turns green (up) or red (down) and gets thicker.
=====================================
3. LABELS ON PROFILE BINS
=====================================
Each profile bin can show a small text label. These describe what is happening
at that specific price level. Here is what each label means:
ABS (with up/down arrow):
"ABS▼ 7b" = Absorption detected. Institutional players are absorbing selling
pressure at this level (likely accumulating). The "7b" means it held for 7 bars.
ABS▼ = absorbing sells (bullish). ABS▲ = absorbing buys (bearish).
FLOW (with arrow):
"FLOW↑" or "FLOW↓" = A flow shift happened here. The delta direction reversed,
meaning buyers took over from sellers or vice versa. This is a momentum change signal.
FAIL (with arrow):
"FAIL↑" or "FAIL↓" = A flow shift was detected but FAILED to confirm.
The reversal started but price did not follow through. Shown in orange.
Often means the opposing side absorbed the move.
INVAL / INVALID:
"INVAL" or "INVALID" = A previously confirmed flow shift was invalidated.
Price reversed back through the shift level, canceling the signal.
Shown in orange. Treat the original shift direction as no longer valid.
BULL EXH / BEAR EXH:
"BULL EXH" or "BEAR EXH" = Exhaustion zone. Extreme delta (above 65%) combined
with FADING volume. The dominant side pushed too hard and is running out of fuel.
Shown in gold. Often precedes a reversal. Higher delta + lower volume = more exhausted.
IMBALANCE RATIO (number:1):
"4:1" = The ratio of buy volume to sell volume (or vice versa) at this bin.
A 4:1 ratio means one side has 4x the volume of the other.
Only shown when the imbalance exceeds the configured threshold.
ICE:
"ICE" = Iceberg order detected in this bin. High volume traded but price barely
moved, suggesting a large hidden order was absorbing all the activity.
CONFL / CONF+ / CONF-:
Confluence detected. Multiple signals (structure + order flow) agree on direction.
CONF+ = bullish confluence. CONF- = bearish confluence.
CONFLICT:
Structure says one thing, order flow says another. Be cautious.
STK (with multiplier):
"STK x3" = Imbalance stack. Three or more consecutive bins all lean the same
direction. Shows institutional pressure building across multiple price levels.
OB (with arrow):
"OB↑" or "OB↓" = This bin overlaps with an active Order Block (see section 6).
FVG (with arrow):
"FVG↑" or "FVG↓" = This bin overlaps with an active Fair Value Gap (see section 7).
"uFVG↑" or "uFVG↓" = Same but for a micro-level FVG (smaller gap detected
within the profile structure rather than on-chart candle gaps).
uSR:
Micro structure level. A price level that has been tested multiple times with
high volume -- acts as local support or resistance.
EQUILIBRIUM / BULL ATK / BEAR DEF / etc:
Context labels that describe the state of the bin:
- EQUILIBRIUM = balanced buyers and sellers
- BULL ATK = buyers attacking with increasing volume
- BULL DEF = buyers holding but volume fading
- BEAR ATK = sellers attacking with increasing volume
- BEAR DEF = sellers holding but volume fading
CONFIDENCE SCORE (number at end of label):
Example: "ABS▼ CONFL "
The number in brackets is a confidence score from 0-100.
Higher = more signals agreeing. Above 70 is strong.
DWELL TIME:
"8d" at the end means price spent 8 bars dwelling at this level.
More time at a level = stronger support/resistance.
=====================================
4. ARROWS ON PROFILE BINS
=====================================
Small arrows may appear to the right of profile bars:
DELTA ARROWS (>> or ^^):
Show if buying/selling pressure is accelerating or decelerating.
">>" pointing up = bullish momentum gaining speed
">>" pointing down = bearish momentum gaining speed
VOLUME ARROWS:
Show if volume is increasing or decreasing at each level.
Up arrow = volume building. Down arrow = volume fading.
VELOCITY BANDS:
Small colored boxes to the right of the profile.
Green = volume accelerating. Red = volume decelerating.
Only appears on high-volume bins.
=====================================
5. CVD LINE (curved line inside the profile)
=====================================
The colored line running through the profile area is the CVD
(Cumulative Volume Delta) line.
It tracks the running total of buy volume minus sell volume across the session.
- Line going UP = buyers accumulating over time
- Line going DOWN = sellers accumulating over time
HOW THE LINE COLOR WORKS:
The line color is NOT random. It checks the CVD value against 5 moving averages
(EMA 8, 13, 21, 34, and 55). Each EMA that CVD is ABOVE scores +1. Each EMA
that CVD is BELOW scores -1. The total score (-5 to +5) sets the color:
+5 (above ALL 5 EMAs) = deep forest green -- strong bullish momentum
+3 to +4 = bright green -- solid bullish
+1 to +2 = light green -- lean bullish
0 = gray -- neutral, no clear direction
-1 to -2 = light red -- lean bearish
-3 to -4 = bright red -- solid bearish
-5 (below ALL 5 EMAs) = deep dark red -- strong bearish momentum
In practice: when the line shifts from red to green, it means CVD has crossed
above its moving averages -- buying pressure is accelerating. When green turns
red, selling pressure is taking over. A gray section means CVD is choppy and
sitting between its averages with no conviction.
CVD LABEL (at the right end of the line):
"CVD +1.2K +5"
First number = raw CVD value (+1,200 net buy volume)
Second number = confirmation count (+5 means 5 consecutive bars where the
adaptive reset system confirmed the bullish direction)
The label color uses a separate gradient based on the confirmation count:
Deep green = many consecutive bullish confirmations
Deep red = many consecutive bearish confirmations
Yellow/gray = few or mixed confirmations
=====================================
6. ORDER BLOCKS (OBs) - colored boxes on candles
=====================================
Order Blocks are zones where institutions placed large orders.
They appear as colored boxes around groups of candles.
ACTIVE OBs (not yet tested):
- Green/teal box = bullish OB (expect support when price returns)
- Red box = bearish OB (expect resistance when price returns)
- Solid fill, extends rightward from the origin candles
BROKEN OBs (breakers):
- Same colors but with a transparent fill and border outline only
- A bullish OB becomes a breaker when price closes below its bottom
- A bearish OB becomes a breaker when price closes above its top
- Once broken, the OB flips role: old support becomes resistance and vice versa
- A dotted midline shows the 50% level of the broken OB
- If price then closes through the breaker in the new direction, it is removed entirely
Two detection methods run simultaneously:
- Fast: simple 3-bar pivot swings for reactive OBs near current price
- Deep: ICS-style fractal depth swings for structural OBs from further back
The "Detection Depth" setting controls the fractal depth (Short/Intermediate/Long Term).
=====================================
7. FAIR VALUE GAPS (FVGs) - striped zones on candles
=====================================
FVGs are gaps in the price action where one side (buyers or sellers) was so
dominant that price skipped over a range. Price tends to come back and fill these gaps.
They appear as small striped/hatched boxes at the gap location.
- Purple-ish stripes = the gap zone
- Each individual stripe is deleted when price crosses through its midpoint,
so the gap visually erodes from the inside out as price fills it
- After 21 bars, remaining unfilled stripes fade to show the gap is aging
- Once every stripe is filled, the FVG is fully removed from the chart
- Maximum 30 FVGs tracked at once (oldest removed first if exceeded)
=====================================
8. MULTI-TIMEFRAME BOXES (2m / 5m / 15m)
=====================================
Colored boxes extending behind and slightly ahead of the current candles.
These show FVGs and Order Blocks detected on HIGHER timeframes (2-minute,
5-minute, 15-minute charts) projected onto your 1-minute chart.
HOW TO TELL THEM APART:
Border style:
- Dashed border = FVG (Fair Value Gap)
- Solid border = OB (Order Block)
Thickness and length:
- Thin border, extends 20 bars back = 2-minute timeframe
- Thin border, extends 30 bars back = 5-minute timeframe
- Thick border, extends 50 bars back = 15-minute timeframe
Color:
- Cyan/teal = bullish (expect support)
- Orange = bearish (expect resistance)
When your 1-minute price touches a higher-timeframe structure, it carries
more weight because institutions watch those levels.
=====================================
9. PREDICTIVE CONFLUENCE ZONES (projected boxes)
=====================================
These are the "ZONE S x3" and "ZONE R x2" boxes that project AHEAD of current price
(to the right of the last candle).
They appear when multiple structures from different sources cluster at the
same price area:
- 1m Order Blocks + 1m FVGs + 2m structures + 5m structures + 15m structures
The system scans all unmitigated levels, finds where they overlap, and projects
a high-probability reaction zone.
"ZONE S x3" = Support zone, 3 structures converge here (green box)
"ZONE R x2" = Resistance zone, 2 structures converge here (red box)
Higher count = stronger zone. These are the highest-conviction levels on the chart.
=====================================
10. SIGNAL LABELS ON CANDLES
=====================================
These labels appear directly on or near candles when specific conditions are met:
SWEEP LABELS (cyan/magenta bubbles):
Example: "VA High 8"
A liquidity sweep happened -- price wicked past a key level and reversed.
The name shows which level was swept. The number is a quality score.
Higher score = more reliable sweep. Cyan = bullish sweep. Magenta = bearish.
ICE (cyan/red squares):
Small squares below (bull) or above (bear) candles.
"ICE 2.3x" = Iceberg order detected. Volume was 2.3x average but price
barely moved. A hidden large order was absorbing all activity.
COILED:
"COILED " = Price has been compressing (low volatility) for 4 bars
while sitting near a wall of support/resistance. Like a spring ready to release.
Green = bullish coil (expect breakout up). Red = bearish coil (expect breakdown).
!!SR (with arrow and count):
"!!SR 5x" = A wall of 5 micro-structure levels stacked at this price.
Strong support (arrow down, green) or resistance (arrow up, red).
CVD DIV:
"CVD DIV (up arrow)" = Bullish CVD divergence. Price is making lower lows but CVD
is improving -- hidden buying.
"CVD DIV (down arrow)" = Bearish CVD divergence. Price making higher highs but CVD
declining -- hidden selling.
VA BREAK:
"VA BREAK (up arrow)" or "VA BREAK (down arrow)" = Price just broke out of the Value Area.
A thick green or red line extends forward showing the breakout level.
This is a high-momentum signal.
VOLUME SPIKE:
"x3.2" = Volume on this candle is 3.2x the average. Shows in magenta above the candle.
REJECT:
"REJECT (arrow)" = Price momentum is pushing into a wall of support or resistance.
Warns of a potential rejection/reversal at that wall.
=====================================
11. SEQUENCE PATTERNS (triangles)
=====================================
These track a full institutional flow sequence through 4 stages:
1. ABSORPTION = institution absorbs orders at a level
2. FLOW SHIFT = delta reverses confirming direction
3. SWEEP = liquidity grab confirms intent
4. BREAKOUT = Value Area breakout completes the pattern
PROGRESS LABELS (small, during build-up):
"SEQ:SHIFT" or "SEQ:SWEEP" = Sequence is building, currently at that stage.
COMPLETED SEQUENCE (large triangle + label):
Hot pink triangle (up or down) with "SEQ BULL " or "SEQ BEAR ".
The number is the sequence score. This is the highest-confidence signal in DSMS.
A full 4-stage institutional sequence just completed.
=====================================
12. CANDLE TECH (colored candle borders)
=====================================
Certain candles get a colored border and a small label:
- Green border = bullish pattern detected (hammer, bullish engulfing, etc.)
- Red border = bearish pattern detected (shooting star, bearish engulfing, etc.)
The label shows:
"R 5" = Reversal pattern, score 5
"(up arrow) 3" = Continuation pattern, score 3
Higher score = more confirming factors (CVD alignment, volume surge, trend direction).
Thicker border = stronger pattern.
=====================================
13. LIQUIDITY VOID LINES
=====================================
Yellow dashed horizontal lines extending left from the profile.
These mark price levels with very low volume -- gaps where price moved
through quickly without much trading. When price returns to these levels,
it tends to move through them fast again or react sharply.
=====================================
14. STATE OF THE ARENA TABLE (corner dashboard)
=====================================
The table in the corner of the chart is the real-time scoring dashboard.
It combines all signals into one weighted score from -100 (max bearish) to +100 (max bullish).
HEADER ROW:
Shows the overall market state and final score.
States: BREAKOUT, TRENDING, COMPRESSED, CONTESTED, or NEUTRAL.
COMPONENT ROWS (each scored -100 to +100, weighted into final score):
Delta Flow (10%) -- raw buying vs selling pressure on current bar
CVD Flow (10%) -- cumulative volume delta trend and EMA band position
Flow Shift (9%) -- recent delta direction reversals
Absorption (9%) -- institutional stop hunt detection
Sequence (8%) -- institutional flow sequence progress
Confluence (7%) -- structural + psychological signal agreement
OB/FVG (7%) -- nearest order block or gap bias
Sweep (7%) -- recent liquidity grab signals
MTF (6%) -- multi-timeframe alignment (2m/5m/15m)
Volume (6%) -- spike detection
Walls (6%) -- support/resistance cluster strength
Accel (5%) -- delta acceleration (2nd derivative of momentum)
Iceberg (4%) -- hidden institutional order detection
Candle (3%) -- pattern recognition score
POC Shift (3%) -- value area migration direction
The final score is the weighted sum, clamped to -100 to +100.
70+ or below -70 = STRONG conviction
40-69 = MEDIUM conviction
15-39 = WEAK conviction
Below 15 = no clear direction
Each row shows a text status, numeric score, and a visual bar made of blocks.
Green blocks = bullish. Red blocks = bearish. More blocks = stronger signal.
SIGNAL SECTION (bottom of table):
Shows the single highest-priority actionable signal right now.
"Key" = what the signal is based on
"Action" = suggested stance (BUY / SELL / HOLD / CAUTION)
"Watch" = what to watch for next
=====================================
QUICK REFERENCE - COLOR GUIDE
=====================================
Cyan/Teal ......... Bullish structures, support, buy signals
Red/Orange ........ Bearish structures, resistance, sell signals
Green ............. Bullish momentum, buyers winning
Red ............... Bearish momentum, sellers winning
Yellow ............ Liquidity voids, caution zones
Purple ............ FVG gap zones
Hot Pink .......... Completed sequence patterns
Magenta ........... Volume spikes, sweep highlights
Gold .............. Predictive zone projections
White text ........ All on-chart signal labels
=====================================
ALERTS
=====================================
DSMS has 6 built-in alerts you can set from TradingView's alert menu:
Flow Shift -- delta direction reversed at a price level
Volume Spike -- volume exceeds threshold with bin concentration
VA Breakout -- price broke out of the Value Area
Strong Confluence -- multiple signals align above the confluence threshold
Absorption -- institutional absorption pattern detected
Sequence Complete -- full 4-stage institutional sequence finished
To set an alert: click the alarm clock icon in TradingView, select DSMS as
the condition source, pick the alert type, and choose your notification method.
Each alert can be toggled on/off in the settings panel.
=====================================
SETTINGS OVERVIEW
=====================================
Everything is toggleable. The main groups in settings are:
Core Settings -- lookback period, number of bins, profile width
Display Options -- toggle heatmap, delta flow, volume breakdown, POC
1M Scalping -- CVD line, zoomed-out mode, volume trend arrows
Signal Settings -- enable/disable each signal type
Advanced Tuning -- compression bars, confidence thresholds
OB/FVG Settings -- order block depth, FVG stripe count, max blocks
Candle Tech -- pattern detection and scoring
Liquidity Sweeps -- wick ratio, volume requirement, score display
Tier 3: Flow Intel -- sequence patterns, multi-timeframe (2m/5m/15m), predictive zones
Colors -- customize every major visual element
State of the Arena -- table position, size, and which components to show
Momentum Candle Detector - [RZ]Overview
This lightweight overlay indicator identifies high-conviction momentum candles . Candles where the body constitutes a very large proportion of the overall range, indicating strong directional pressure with minimal opposition from opposing buyers/sellers.
A candle qualifies as a momentum candle when body / (high - low) ≥ Body Ratio Threshold .
Bullish momentum candles are highlighted in the user-selected bullish color.
Bearish momentum candles are highlighted in the user-selected bearish color.
Key Features
• Simple, clean visualization using barcolor()
• Adjustable Body Ratio Threshold (50–100 %) to match different instruments, timeframes, or trading styles
• Customizable colors for bullish and bearish momentum candles
• Built-in alert conditions for bullish and bearish momentum events
How to Interpret
• Bullish momentum candle : strong buying pressure; the close is significantly higher than the open with very small wicks. Often appears at the start or continuation of upward moves.
• Bearish momentum candle : strong selling pressure; the close is significantly lower than the open with minimal wicks. Frequently seen at the beginning or acceleration of downward moves.
Disclaimer
This indicator is provided strictly for educational and informational purposes . It is not financial advice, investment recommendation, or solicitation to buy or sell any security, cryptocurrency, forex pair, commodity, or other asset. Trading involves substantial risk of loss and is not suitable for every investor. Past performance whether of the indicator or simulated signals does not guarantee future results. Users are solely responsible for any trading decisions made while using this script. Always conduct your own research and consider consulting a qualified financial advisor before trading.
PanelPro EMA / MACD / RSI / HH-LL / Vol Delta / % Change / ScoreGold Scalping Panel Pro - All-In-One Trading Dashboard
Stop Switching Between Multiple Indicators. Trade Smarter, Faster.
The Gold Scalping Panel Pro is the ultimate real-time trading companion for serious scalpers and day traders. Designed specifically for Gold (XAUUSD) but works on any market, this powerful tool combines 5 essential indicators into one compact, easy-to-read dashboard.
Key Features
✅ EMA - Exponential Moving Average (20/50)
✅ MACD - Moving Average Convergence Divergence
✅ RSI - Relative Strength Index (14)
✅ HH/LL - Higher Highs / Lower Lows (Market Structure)
✅ Vol Delta - Volume Delta (Buy vs Sell pressure)
✅ % Change - Real-time candle percentage change
✅ Score 0-10 - Multi-indicator trend score
🎯 What Makes It Different?
Instead of cluttering your chart with 4-5 separate indicator windows, get instant market clarity with a single glance. Our intelligent Trend Score Algorithm analyzes multiple data points simultaneously and gives you a clear 0-10 score with strength percentage.
No more guessing. No more analysis paralysis. Just clear, actionable signals.
📊 Core Features
1. Intelligent Trend Score (0-10)
Real-time calculation based on 5 technical indicators
Color-coded strength meter: Bullish (Green), Bearish (Red), Neutral (Orange)
Percentage strength indicator: Know exactly how strong the trend is (e.g., "80% | Strong")
Eliminates confusion from conflicting indicators
2. Multi-Indicator Confirmation Dashboard
Get instant status of all major indicators in one compact panel:
✅ EMA 20/50 - Trend direction (Bull/Bear/Flat)
✅ MACD - Momentum confirmation (+/-)
✅ RSI (14) - Overbought/Oversold levels with real-time value
✅ Market Structure - Higher Highs (HH) / Lower Lows (LL) / Range detection
3. Volume Delta Analysis
Buy Volume vs Sell Volume breakdown
Net Delta with color-coded background (Green for buyers, Red for sellers)
Understand who's in control of the market right now
Note: Uses tick volume approximation for spot markets
4. Real-Time Price Change
Live % change of the current candle
Color-coded (Green for positive, Red for negative)
Perfect for scalping - know the current momentum instantly
5. Visual Trend Score Chart
Graphical representation of the trend score over time
Colored zones: Bullish (above 7), Bearish (below 3), Neutral (4-6)
Background shading for instant visual confirmation
See trend strength evolution at a glance
⚡ Built for Scalpers
Real-Time Updates
Calculates on every tick of the current candle
No lag, no delays - see changes as they happen
Perfect for M1, M5, M15 scalping timeframes
Compact Design
Horizontal layout that doesn't block your chart
Positioned at bottom-right (customizable in settings)
All critical info in one line - maximum screen space for price action
Clean, Professional Interface
Dark theme optimized for long trading sessions
Color-coded values for instant recognition
Large, readable text - no squinting required
🔧 Fully Customizable
Adjust the indicator to match your trading style:
EMA Periods (default: 20/50)
RSI Length (default: 14)
MACD Parameters (default: 12/26/9)
Panel position (9 positions available)
All TradingView standard settings
📈 How It Works
The Trend Score Algorithm combines 5 indicators with intelligent weighting:
Indicator Weight Contribution
EMA 20/50 High ±2 points
MACD High ±2 points
RSI Medium ±1 point
Structure Medium ±1 point
Volume DeltaLow±1 point
Score 7-10: Strong Bullish - Consider LONG entries
Score 4-6: Neutral - Wait for better setup
Score 0-3: Strong Bearish - Consider SHORT entries
💡 Perfect For:
✅ Gold (XAUUSD) scalpers - Optimized for precious metals
✅ Forex day traders - Works on all currency pairs
✅ Crypto traders - Clear signals in volatile markets
✅ Futures traders - Real volume data when available
✅ Anyone tired of indicator overload - Simplify your trading
🎓 Use Cases
Scenario 1: Quick Entry Confirmation
You see a potential long setup at support.
Quick check: Score 8/10 | 80% Strong | EMA Bull | MACD + | Delta +4,130
✅ All systems aligned - HIGH CONFIDENCE entry
Scenario 2: Avoid Bad Trades
Price breaks resistance, looks bullish.
Quick check: Score 4/10 | 50% Weak | MACD - | Delta -2,500
⚠️ Conflicting signals - WAIT for better opportunity
Scenario 3: Exit Timing
In a long position, profit target near.
Quick check: Score drops from 8 → 5, Delta turns negative
🚪 Momentum fading - TIME TO EXIT
📊 What You Get
✅ One indicator replaces 5 - Save chart space
✅ Instant decision support - No more second-guessing
✅ Real-time calculations - Stay ahead of the market
✅ Clean, professional design - Focus on trading, not decoding indicators
✅ Works on any market - Gold, Forex, Crypto, Stocks, Futures
✅ Regular updates - Continuous improvement based on user feedback
⚙️ Technical Specifications
Pine Script v5 - Latest TradingView standard
Overlay: False - Separate pane below chart
Real-time execution - Updates on every bar close
Light weight code - No performance impact
Compatible with all TradingView plans
🚀 Get Started in 30 Seconds
Add indicator to your chart
Open Gold (XAUUSD) or your preferred symbol
Set your preferred scalping timeframe (M1, M5, M15)
Start trading with instant clarity
💬 Trader Testimonials
"Finally, an indicator that doesn't confuse me with conflicting signals. The trend score makes my decisions so much easier."
— Professional Gold Scalper
"I went from using 5 separate indicators to just this one. My charts are cleaner and my trading is better."
— Forex Day Trader
"The real-time updates are perfect for M5 scalping. I can see momentum shifts before they're obvious on the chart."
— Crypto Scalper
📞 Support & Updates
Responsive support - Questions answered within 24h
Regular updates - New features based on community feedback
Trading tips - Occasional insights on how to maximize the tool
No hidden fees - One price, full access
🎁 Special Launch Offer
$29.99/month → $14.99/month
Limited time: First 100 subscribers get lifetime access at this price!
⚠️ Risk Disclaimer
Trading involves risk. Past performance does not guarantee future results. This indicator is a tool to assist your decision-making, not financial advice. Always use proper risk management and never risk more than you can afford to lose.
🔥 Join Hundreds of Successful Traders
Stop guessing. Start trading with confidence.
Questions? Contact us at wesler131313@gmail.com
Gold Panel Pro EMA/MACD/RSI/VolDelta/%Change/Score/HH_LLGold Scalping Panel Pro - All-In-One Trading Dashboard
Stop Switching Between Multiple Indicators. Trade Smarter, Faster.
The Gold Scalping Panel Pro is the ultimate real-time trading companion for serious scalpers and day traders. Designed specifically for Gold (XAUUSD) but works on any market, this powerful tool combines 5 essential indicators into one compact, easy-to-read dashboard.
🎯 What Makes It Different?
Instead of cluttering your chart with 4-5 separate indicator windows, get instant market clarity with a single glance. Our intelligent Trend Score Algorithm analyzes multiple data points simultaneously and gives you a clear 0-10 score with strength percentage.
No more guessing. No more analysis paralysis. Just clear, actionable signals.
📊 Core Features
1. Intelligent Trend Score (0-10)
Real-time calculation based on 5 technical indicators
Color-coded strength meter: Bullish (Green), Bearish (Red), Neutral (Orange)
Percentage strength indicator: Know exactly how strong the trend is (e.g., "80% | Strong")
Eliminates confusion from conflicting indicators
2. Multi-Indicator Confirmation Dashboard
Get instant status of all major indicators in one compact panel:
✅ EMA 20/50 - Trend direction (Bull/Bear/Flat)
✅ MACD - Momentum confirmation (+/-)
✅ RSI (14) - Overbought/Oversold levels with real-time value
✅ Market Structure - Higher Highs (HH) / Lower Lows (LL) / Range detection
3. Volume Delta Analysis
Buy Volume vs Sell Volume breakdown
Net Delta with color-coded background (Green for buyers, Red for sellers)
Understand who's in control of the market right now
Note: Uses tick volume approximation for spot markets
4. Real-Time Price Change
Live % change of the current candle
Color-coded (Green for positive, Red for negative)
Perfect for scalping - know the current momentum instantly
5. Visual Trend Score Chart
Graphical representation of the trend score over time
Colored zones: Bullish (above 7), Bearish (below 3), Neutral (4-6)
Background shading for instant visual confirmation
See trend strength evolution at a glance
⚡ Built for Scalpers
Real-Time Updates
Calculates on every tick of the current candle
No lag, no delays - see changes as they happen
Perfect for M1, M5, M15 scalping timeframes
Compact Design
Horizontal layout that doesn't block your chart
Positioned at bottom-right (customizable in settings)
All critical info in one line - maximum screen space for price action
Clean, Professional Interface
Dark theme optimized for long trading sessions
Color-coded values for instant recognition
Large, readable text - no squinting required
🔧 Fully Customizable
Adjust the indicator to match your trading style:
EMA Periods (default: 20/50)
RSI Length (default: 14)
MACD Parameters (default: 12/26/9)
Panel position (9 positions available)
All TradingView standard settings
📈 How It Works
The Trend Score Algorithm combines 5 indicators with intelligent weighting:
Indicator Weight Contribution EMA 20/50High±2 pointsMACDHigh±2 pointsRSIMedium±1 pointStructureMedium±1 point Volume DeltaLow±1 point
Score 7-10: Strong Bullish - Consider LONG entries
Score 4-6: Neutral - Wait for better setup
Score 0-3: Strong Bearish - Consider SHORT entries
💡 Perfect For:
✅ Gold (XAUUSD) scalpers - Optimized for precious metals
✅ Forex day traders - Works on all currency pairs
✅ Crypto traders - Clear signals in volatile markets
✅ Futures traders - Real volume data when available
✅ Anyone tired of indicator overload - Simplify your trading
🎓 Use Cases
Scenario 1: Quick Entry Confirmation
You see a potential long setup at support.
Quick check: Score 8/10 | 80% Strong | EMA Bull | MACD + | Delta +4,130
✅ All systems aligned - HIGH CONFIDENCE entry
Scenario 2: Avoid Bad Trades
Price breaks resistance, looks bullish.
Quick check: Score 4/10 | 50% Weak | MACD - | Delta -2,500
⚠️ Conflicting signals - WAIT for better opportunity
Scenario 3: Exit Timing
In a long position, profit target near.
Quick check: Score drops from 8 → 5, Delta turns negative
🚪 Momentum fading - TIME TO EXIT
📊 What You Get
✅ One indicator replaces 5 - Save chart space
✅ Instant decision support - No more second-guessing
✅ Real-time calculations - Stay ahead of the market
✅ Clean, professional design - Focus on trading, not decoding indicators
✅ Works on any market - Gold, Forex, Crypto, Stocks, Futures
✅ Regular updates - Continuous improvement based on user feedback
⚙️ Technical Specifications
Pine Script v5 - Latest TradingView standard
Overlay: False - Separate pane below chart
Real-time execution - Updates on every bar close
Lightweight code - No performance impact
Compatible with all TradingView plans
🚀 Get Started in 30 Seconds
Add indicator to your chart
Open Gold (XAUUSD) or your preferred symbol
Set your preferred scalping timeframe (M1, M5, M15)
Start trading with instant clarity
💬 Trader Testimonials
"Finally, an indicator that doesn't confuse me with conflicting signals. The trend score makes my decisions so much easier."
— Professional Gold Scalper
"I went from using 5 separate indicators to just this one. My charts are cleaner and my trading is better."
— Forex Day Trader
"The real-time updates are perfect for M5 scalping. I can see momentum shifts before they're obvious on the chart."
— Crypto Scalper
📞 Support & Updates
Responsive support - Questions answered within 24h
Regular updates - New features based on community feedback
Trading tips - Occasional insights on how to maximize the tool
No hidden fees - One price, full access
🎁 Special Launch Offer
$29.99/month → $14.99/month
Limited time: First 100 subscribers get lifetime access at this price!
⚠️ Risk Disclaimer
Trading involves risk. Past performance does not guarantee future results. This indicator is a tool to assist your decision-making, not financial advice. Always use proper risk management and never risk more than you can afford to lose.
🔥 Join Hundreds of Successful Traders
Stop guessing. Start trading with confidence.
Questions? Contact us at wesler131313@gmail.com
[CT] Displacement FVG Toolkit Displacement FVG Toolkit is a complete ICT market-structure and execution toolkit designed to help you identify when price is truly repricing, where that repricing left inefficiencies, and how to frame trades with clear context, confirmation, and invalidation. The indicator brings together six institutional-grade concepts into one workflow, Displacement, Fair Value Gaps, Reload Zones, Dealing Range premium and discount, CISD, and Market Structure breaks, so you can stop reacting to random candles and start trading the sequence that professional order flow tends to follow, impulse, imbalance, retrace, and continuation or reversal.
The Displacement tool is the engine that decides whether a candle represents meaningful participation or ordinary noise. Displacement is measured by comparing the current candle’s size to the average candle size over a user-defined lookback. You can choose whether the script uses the candle body size or the full high-to-low range for this calculation. When the candle exceeds the average by your selected displacement factor, it is flagged as displacement. Displacement is important because it is the clearest visible clue that the market has moved from balanced auction to aggressive repricing, which is the environment where inefficiencies form and where your best retest trades are born. In the photo, the yellow bars represent the displacement bars, and the indicator prints Buy and Sell markers on those displacement events. The user also has full control to color displacement bars to a color of their choice, so whether you prefer bright yellow, muted gray, or any custom brand color, you can set the exact bullish and bearish displacement bar colors in the inputs. If you do not want bar coloring at all, you can simply turn off displacement bar coloring and use only the markers.
The Structure Filter is a powerful addition that prevents displacement from becoming “any big candle.” When enabled, the indicator requires the displacement candle to also break recent structure, meaning price must break above a recent high for bullish displacement or below a recent low for bearish displacement. You can decide whether the structure break is judged by a candle close beyond the prior structure level or by a wick that pierces it. Close-based structure breaks are cleaner and generally reduce false positives, while wick-based breaks are more sensitive and can trigger earlier at the cost of more noise. This filter matters because a large candle in the middle of chop is not the same as a large candle that actually breaks a meaningful swing point, and the indicator gives you a way to enforce that distinction mechanically.
The Fair Value Gap tool identifies the most valuable type of imbalance, the three-candle FVG, but it only plots those gaps when they are created by validated displacement. A bullish FVG forms when the current candle’s low is above the high from two candles ago, showing that price skipped a region without fully transacting through it. A bearish FVG forms when the current candle’s high is below the low from two candles ago. These gaps represent unfinished auction, a fast repricing that often leaves behind an inefficiency the market may later revisit to rebalance. You can choose to extend FVGs to the right for a set number of bars so you can see the levels well into the future, or you can keep them confined to the period when they formed. You can also choose whether mitigated FVGs remain visible or are hidden. Mitigation in this script means price has traded back into the gap far enough to invalidate it as an active inefficiency, and when that happens you can either keep it on the chart as historical context or remove it to keep your chart clean. The script also manages object limits by keeping only a user-defined maximum number of FVGs, trimming older ones as needed so the indicator remains stable.
Reload Zones are derived directly from the FVGs and are built for execution. Instead of treating the entire gap as the same, the indicator highlights the portion of the imbalance that most often functions as the highest-quality retest area for continuation entries. For bullish FVGs, the Reload Zone is drawn as the upper portion of the gap, and for bearish FVGs it is drawn as the lower portion, which keeps your focus on the retest region that is closest to the direction of repricing and typically provides tighter invalidation. The indicator also includes an optional Invalidation line that marks the far edge of the full FVG, giving you a clean and consistent “line in the sand” for risk management. The intended use is straightforward, you wait for displacement to print and create an FVG, you allow price to retrace into the Reload Zone, and you look for rejection behavior that confirms responsive participation, such as wicks into the zone that close back out, sharp reaction candles, or structure holding in the direction of the displacement. When price accepts inside the zone with multiple closes and slow grind, that’s often a sign the inefficiency is being repaired rather than defended, and the reload entry loses quality. Because reload zones are tied to displacement-generated FVGs, they naturally filter out weaker imbalances and focus you on the kind created during true repricing.
The Dealing Range tool provides context by defining a rolling high-to-low range over a user-defined lookback, then splitting that range into premium and discount. The indicator plots DR High, DR Low, and a DR Mid 50% line, and can optionally show PD 62% and PD 38% reference levels inside the range. The fill visually highlights premium above the midpoint and discount below it, which helps you avoid the most common retail mistake, buying in premium and selling in discount without a strong reason. The dealing range is not meant to be a rigid “support and resistance box.” It is meant to help you frame location. In general, long ideas have better location when price is in discount or reclaiming the midpoint with momentum, and short ideas have better location when price is in premium or rejecting the midpoint from below. This becomes especially powerful when combined with your other tools, because a bullish displacement and FVG that forms in discount and then holds the reload zone tends to have much better continuation odds than the same pattern forming at the very top of premium into overhead liquidity.
CISD in this indicator is your liquidity-sweep and directional-shift engine, designed to answer a very specific question, did price just take liquidity and then flip orderflow enough to justify a new directional bias. The script first maps swing liquidity using pivot highs and pivot lows over your selected swing period, then tracks when those levels are wicked or mitigated within an expiry window. When a swing high or swing low is taken, the CISD logic watches for the characteristic shift pattern that follows, and when it qualifies it prints a CISD level and establishes a trend state. The “Noise Filter” setting controls how strict the CISD trigger is, higher values reduce noise and produce fewer but more meaningful CISDs, while lower values produce more signals but may include weaker shifts. The indicator also distinguishes between a normal CISD and a stronger CISD that occurs after opposing liquidity was recently wicked within your liquidity lookback, and those stronger events are marked with the directional ▲/▼ symbols so you can immediately recognize when a sweep-and-shift sequence likely occurred instead of a random flip.
A key feature you asked for, and that this indicator includes, is that CISD levels can extend in a very controlled way so you can keep trading them without guessing where the level “ends.” The current timeframe CISD lines are drawn at the origin level and then the script can extend only the most recent X CISD lines out past the current bar by a user-defined number of bars, without creating gaps or redrawing incorrectly. This means your newest CISD levels remain visually “live” and tradable into the immediate future, while older CISDs automatically restore to their original endpoints and behave normally. This is important for execution because it keeps the focus on the levels that are most likely to matter now, while still preserving history without clutter.
The MTF CISD add-on is what gives you institutional alignment, because it allows a higher timeframe CISD to print onto your execution timeframe. The script computes CISD on the selected HTF using request.security and then draws HTF CISD lines on your chart in real time. You can choose “Confirmed HTF only,” which means the HTF CISD only prints when the higher timeframe candle closes, or you can turn confirmation off to see developing HTF CISDs while the HTF candle is still building. The HTF line style is configurable, and the HTF lines can extend to the right so they behave like real mapped levels. The HTF label is also supported and can be pinned to the right edge with an x-offset, so you always know which timeframe the CISD came from without having to guess. Optional HTF markers can print ▲/▼ on the bar where a new HTF CISD event is detected, which gives you a fast “regime shift” alert that pairs extremely well with your displacement and FVG tools.
CISD also includes a candle coloring option so you can visually trade the bias without constantly reading every label. You can keep candle coloring off, turn on an overlay candle layer using plot candle, or use bar color to recolor the native chart candles. The trend that drives candle color can be the current timeframe CISD trend or, if enabled, the HTF CISD trend so your execution timeframe candles reflect the higher timeframe shift. In the combined script, displacement bar coloring still has priority if you leave it enabled, meaning displacement bars will show your displacement color choice first, and the CISD candle coloring will apply where displacement is not overriding. That’s intentional, because displacement bars are “event bars,” while CISD coloring is “state,” and you want to see both without confusion.
In terms of how to use CISD with the rest of this indicator, the cleanest institutional workflow is to treat CISD as the directional context and trigger, and use displacement, FVG, and Reload Zones as the execution framework. A fresh HTF CISD is your “macro shift” that tells you which side is likely building control, then you wait for displacement on your execution timeframe that agrees with that bias and produces an FVG. The Reload Zone becomes your location for entry on the retrace, BOS/CHOCH tells you if structure is truly transitioning or continuing, and your invalidation stays anchored to the far edge of the FVG or the CISD level depending on which is tighter and more structurally meaningful. When CISD and displacement disagree, that’s usually a “stand down or reduce size” condition unless you’re explicitly trading a reversal, because it often means the market is still in rotation or repairing imbalance rather than trending cleanly.
The BOS and CHOCH tool is the structure confirmation layer. The indicator finds swing highs and swing lows using a pivot-based swing length and then plots structure lines at those pivots. Breaks are detected either by close or by wick, based on your setting. BOS, Break of Structure, signals continuation in the current structural regime, while CHOCH, Change of Character, signals a likely regime change. The indicator uses a simple internal state to differentiate BOS from CHOCH, so you can read structure shifts in real time rather than labeling everything as a generic “break.” You can display structure as lines, labels, or both. The lines extend until price breaks them, then they stop at the break so you can visually see exactly where the market transitioned. This module is especially useful for keeping you out of the trap of assuming a pullback is a reversal. If you see displacement and FVGs but no structural confirmation, you can reduce size or wait. If you see a CHOCH that aligns with a displacement shift and then price returns to a reload zone, you have a much higher quality reversal framework.
When you put these tools together, the intended trading workflow becomes a complete narrative. First you identify meaningful movement through displacement, and if you use the structure filter you ensure it is not just a large candle but a break in the auction. That displacement then creates an FVG, the inefficiency left behind by repricing. The Reload Zone marks the most tradable retest area of that inefficiency, and the invalidation line gives you a clear risk boundary. The Dealing Range tells you whether you are taking that setup from a favorable location, discount for longs or premium for shorts. BOS and CHOCH provide the final confirmation layer that tells you whether you are trading continuation or a genuine structural shift. This structure keeps you from chasing breakouts, because it naturally trains you to wait for the pullback into the reload zone and to only participate when price proves acceptance and rejection behavior at the level.
This indicator is built to be flexible. You can run it as a clean displacement plus imbalance tool by focusing on displacement, FVGs, and reload zones, or you can turn it into a full context-and-confirmation system by adding dealing range and BOS/CHOCH. If you want a high-signal, low-noise chart, keep the structure break requirement on, use close-based breaks, limit the number of active gaps, and hide mitigated gaps. If you want more sensitivity and earlier signals, use wick-based breaks and allow more gaps to remain visible. The goal is always the same, to help you see when the market is actually repricing, to mark the price areas where that repricing left unfinished business, and to give you a consistent way to execute retests with defined risk and clear structural context.


